Showing posts with label DIY. Show all posts

Thursday, March 13, 2014

Cross Stitching: My New Hobby

This year Stephen and I decided that for Valentine's Day we had to give each other handmade gifts only.  No cards, no fantastic presents, handmade only.  I struggled for a while to come up with something to make.  I'm crafty, but I didn't want to make something I've already made before.  I needed something new.

When I was little I remember my Grandma cross stitching and being fascinated watching something come from string and little x's.  I loved the backs as much as fun as the fronts.  I decided that I'd teach myself how to cross stitch and make something funny for Stephen.

Of course I turned to Pinterest and Etsy for inspiration.

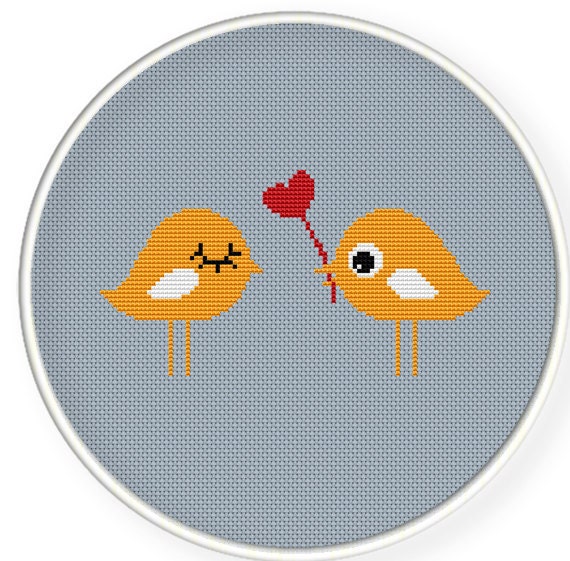
From this AMAZING Etsy shop

This Etsy Shop

The two above, and about 30 other ones made my short list of inspiration but ultimately I decided that I wanted to create my own design.  It would have been SO much easier to pick one of the designs from a shop and buy the template for download, but I don't always do easy.  After some Google searching I found this website that I ended up using to create the text that I wanted to use.  There are a TON of fonts out there, but I liked this site because I was able to write what I wanted and print it out at home.

Next I had to figure out how to lay everything out on a template so I had something to follow.  This is where I almost threw in the towel.  I tried to do it in a fancy new Excel program that takes an image and converts it to small squares but it never worked out right.  I was almost in tears and ended up telling Stephen what I was going to make him so he could try to help.  In the end I turned to trusty old, regular Excel and plotted it in squares.  Definitely not my recommended route, but I was on a time crunch and needed to get moving.

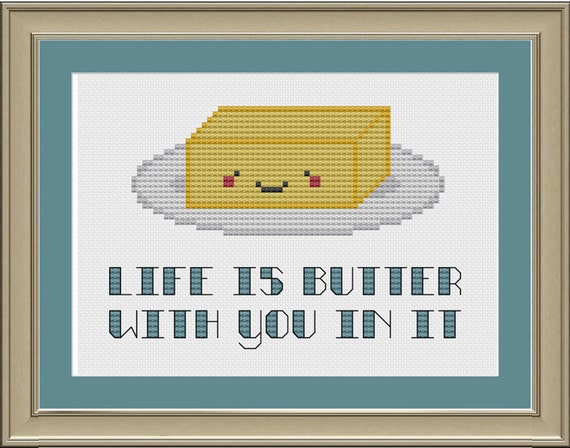
For my Valentine's Day gift I stitched a phrase that I say to Stephen all the time.  He finds it creepy and silly which only encourages me to say it more often.  I have no idea where it came from, but it's stuck with us know.


I'm working on framing it and I think I'm going to hang it in our guest bathroom.  We are actually very short on wall space in the house.  We both love artwork so much we're running out of room.  My cousin has asked me to make me one of these for her because she says something similar to her husband all the time, too.  I guess weird runs in our family.

Thursday, March 21, 2013

Sunburst Mirror using Shims

I thought I'd have so much more time to craft and clean the house and basically fill my time with fun stuff after the wedding and holidays past.  Boy, I was wrong!  We have been so incredibly busy the past few months I haven't really had too much time around the house to be crafty.

We did have a cold weekend a few weeks back and I decided it was time to make something for above our bed.  It was a huge empty, white space that was in desperate need of some pop of color.

The mirror is perfect for the space
Of course I turned to Pinterest and was drawn to the many Sunburst Mirrors out there.  Like this one and this one and this one.  Ultimately I was drawn to this one from Tonya of the Love Of Family & Home blog.

I gathered all of my supplies:

  • 3 packages of shims from The Home Depot (I only used 2)
  • Gorilla Glue Wood Glue, you'll need a lot
  • Craft Paint
  • Circular picture frame with hanging hook already in place
  • 5" mirror
  • Sandpaper
Some bloggers have noted using a scrap piece of plywood and a picture framing hook instead of the picture frame and to be honest that was my plan, but I found a 12 inch circular picture frame at Michael's for $3 and grabbed it.  

My first step was to go through the packages of shims and find all the pretty ones.  You'll know what I mean.  You want some uniformity across the shims, so make sure you pull out the ones that look the best and are the strongest.  Once you have all of the shims, it's time to sand them down.  You can probably skip this step, but I wanted to make sure I didn't have random wood splinters sticking off of some of the shims.  It will take 10 minutes to sand them, just do it.  Also, if you're going to attach your hanging kit to the back of your scrap plywood, do it now.  Don't wait until the shims are glued down!  Once those babies are attached, it is very difficult to move around.  

Painting and gluing begins
Once everything was sanded, I laid out the pattern that I wanted for the sunburst.  There are so many ways you can go with this, do what makes you happy.  I chose to lay my shims flat, others have made a design with the shims on their side.  Be creative.  When you have your layout worked out, with a light pencil, mark your layers if you're like me and did two layers with different colors.  This keeps everything organized when it's time to paint.  

I painted each of my shims their appropriate color (leaving the backside unpainted) and let them dry overnight.  I probably didn't need to wait that long, but I wanted to be sure the wood glue would have no problem sticking.  I would have also painted my picture frame (or plywood) the color of the bottom layer, but I didn't.  Learn from me.  Do it.  

When the paint was dry, it was time to glue.  I used Gorilla Glue Wood Glue and I wasn't shy about how much I used.  I put a generous amount on the back of each shim and placed them down on the picture frame.  To make sure they stayed in place and that the glue held them down with no chance of them falling onto our faces in the middle of the night I put a scrap piece of paper on top of the shims where they were glued down and then put the two heaviest, thickest books I had on top.  I left them there over night.  I wanted those suckers to stay.  In the morning, I removed the books and let the glue dry the rest of the day while I was at work.  The following night it was time to add the 2nd layer.  Because these overlapped I only did 3-4 of these at a time.  Same process - generous amounts of wood glue, placed on the picture frame, held down with heavy books overnight.  I wasn't planning on the project taking a week, but it did.  


Once all the shims were in place and there is no chance that they're coming off, attach the mirror.  Same process - lots of wood glue, heavy books overnight.  I actually left the books on the mirror for a full 24 hours, just to be safe.  

When it was ready to go Stephen and I measured and hung it on the wall!  (Shhh - it may have taken 3 time to get it right, but all evidence is hidden.)  I love it.  Even the small mirror makes such a difference in the room, reflecting the light from the window.  The finished project is 3.5' to 4' across, not a small piece of art.  Yours will depend on how you place your shims, so make sure you have enough space and measure while you're laying it all out in the beginning.  

While I was taking pictures of the mirror on the wall, Mabel wanted to get in on the action.  I saw her coming towards the bed while I was taking pictures and I waited to see what she was going to do.  


Classic photobomb.  She jumped up on the bed, right in front of me and sat there.  I love it.  She knew something other than her had my attention and she was jealous.  I love that pup.
Monday, October 29, 2012

Halloween 2012: Ariel and Prince Eric

Stephen and I didn't do a couple's costume last year, he was Stephen Colbert and I was a box of popcorn.

My Halloween costume, last year
For Halloween this year we tried to think of something we could do together.  After a few brainstorms we came up with Ariel and Prince Eric from Disney's The Little Mermaid.  Now, I'm not one of those people who uses Halloween as an excuse to dress slutty and put on a trashy outfit (see the box above) so I didn't want to be mermaid Ariel, I wanted to be Ariel with legs.

Ariel with legs and Sebastian 
One of my favorite scenes in the movie is when Ariel first gets legs and she's on the beach with her friends.  Scuttle makes an outfit for her with some fabric he finds washed ashore.  She thinks she looks gorgeous.  This is her first time meeting, when they're both fully conscious, Prince Eric.  I only had Sebastian with me because he was the only one of her sea friends that joined her at the palace during her 3 days when she tried to get Eric to kiss her.

Stephen as Prince Eric
How handsome is Stephen dressed as Prince Eric!?!  Our costumes this year were super easy.  I got a 2 yard piece of fabric and some curtain rope and wrapped it around my body and secured with safety pins.  It didn't look nice when Scuttle dressed Ariel in the movie, so I wasn't going for nice.  I found Sebastian on Ebay for $8.  The red wig was technically a Jessica Rabbit wig, but any long, red wig would do for Ariel.

Stephen's costume was even easier.  He bought some blue sweatpants (that I can't wait to steal for myself) and some black "boots".  The boots are really covers that fit over his regular shoes to look like they are boots.  Then he wore a white button down shirt and we got a yard of red fleece fabric for his belt.  Done and done.  We had to spray his hair with some black hair spray, but we already had that on hand from last year's Halloween.

Ariel and Price Eric
We went to a pretty huge Halloween party at one of our favorite bars.  I was surprised with how many people recognized me and when they did they told me how much they loved the movie.  I expected ladies to know who I was, but I was surprised at how many men also recognized me as well.  Pretty fun.

Two friends went with us to the party dressed as Abe Lincoln Vampire Hunter (doesn't he look awesome!) and Nikki Minaj.


If anyone can pull of Nikki, she can.  We had a great time at the party and I'm sad Halloween is already come and gone.  We'll still get the kids trick-or-treating on Wednesday night, so it's not technically gone, but we won't dress up to hand out candy so it's done for us.


Happy Halloween everyone!

Monday, October 22, 2012

DIY Christmas Wreath with Yarn

I love decorating for the holidays/seasons/months/birthdays/etc and because our front door is the first thing guests will see when they come to our house, I want to make sure it's always decorated in some way.  Right now, for Florida Football we have the Gator Ribbon Wreath that I made a few weeks ago. The Gators are undefeated right now so it's not going anywhere until after the last regular season game.  

Supplies for the yarn Christmas wreath
I have a couple of Christmas decoration projects lined up in my head, so starting in October seems like the best plan for me to get everything done by Thanksgiving weekend, when I decorate for Christmas at our house.  I decided to make a bright, red and green wreath for our front door.  Our gate is white, so the red and green will really stand out which is what I want to happen.

I was aiming for something simple yet classic looking and also something I should help others make for their homes.  I came up with a yarn wrapped wreath with some really pretty, fake poinsettias and red ribbon.

To make my wreath you'll need:

  • Foam circle from a craft store or dollar store.  Mine is a 12" circle
  • Fake poinsettias or any other holiday decor you'd like to display.  We toyed with some holly or even some white flowers but landed on the poinsettias because of their bright red color.
  • Yarn, any color that you want while matching your flower choice.  I went with a deep green.  The yarn aisle at Michael's had about 10 different dark greens to choose from.  
  • Ribbon to hang the wreath.  You could also hang this wreath from a wreath hook, it's up to you.
  • Hot glue gun and scissors.   


Wrap the yarn around the foam circle
The first step in making the wreath is to wrap the yarn around the circle.  For my 12" circle it took about 90 minutes to get it wrapped.  It's a mindless and easy process, so sit down in front of the TV and pop in a movie and start wrapping!  To start the yarn I tied a knot in the yarn and just started wrapping around the foam.  I pulled it tight as I went and made sure that the foam didn't show through.  I used a thin yarn because it was the color I wanted, if you use something thicker it might not take you as long.


Yarn wrapped wreath - it's almost done!
Once it's all wrapped I secured it with hot glue.  I made sure the loose end was glued securely to the rest of the yarn.  It doesn't have to look pretty, it won't be seen once the wreath is complete.  

Add the pretty poinsettia to the wreath
Once the yarn is secure, add on the poinsettia or other floral piece that you have.  I cut the flower from the stem and attached it with a TON of hot glue.   I also used some yarn to tie it to the wreath, and hot glued that down too.  I had to position the leaves where I wanted them and glued them down, too.


Give the glue some time to cool down and harden and then it's time to hang!  I used some red ribbon that we picked up at Michaels for our hanging piece.  

I love how the wreath turned out. You'll notice that I started with two poinsettia flowers but when it came time to add the second one I felt that one was enough.  Now i have another flower to use somewhere else.  I call that a crafting bonus.    


Wednesday, September 19, 2012

Small Living Room Solution: Shelf behind the Couch


Our house is teeny tiny.  It was built in 1940.  Apparently back then they liked small rooms, no closets and a lot of fireplaces.  Even in our house, when it was just 900 square feet before the addition of the master suite, there were THREE fireplaces.  One has since been removed to renovate the kitchen but there is still evidence of it in the attic.  

There are 4 of us living in our house, two humans and to very playful dogs.   Mabel always wants to play and Goose is more than willing to join her.  Because our house is so small, they tend to do some furniture rearranging while they play....or we do it for them before something (else) gets broken.  

Mabel and Goose involved in a heated tug-of-war battle
You can see above that when they get going tugging or wrestling, there isn't much room.  Can you imagine if we had been sitting on the couch or in the chair on the right?  We needed a solution to this small living room.

Our first step was to remove the tables you see above.  The black Ikea coffee table was perfect for the size of the room, but every time the dogs wanted to play it had to be pushed to the window so the didn't knock things over with their tails.  The wooden table at the top right of the picture had to go, too.  It was holding our stereo system and Internet router.

We couldn't have a living room without somewhere to put our magazines, cups, remotes, so we decided to put up a shelf behind the sofa.  My inspiration came from the blog Young House Love who build a really amazing console table behind their sectional in their living room.  We don't have the tools, DIY skills or time to build something as elaborate as they were able to put together, but Lowes had exactly what we needed.

We found a long shelf with wall brackets for less than $25.  We love solutions to our problems that don't hurt our wallets.  We centered the shelf behind the couch and attached it to the wall with some pretty serious anchors so we know that baby isn't going anywhere.

Top view of the couch with the new shelf behind it
The shelf is 11 inches wide, so while we had to push the couch a little bit off the wall, the space we lost was far less than if we still had a coffee table in the middle of the floor.  


Look at all the new floor space we have now!  Mabel had to check out what was going on, she loves the camera.
All of the extra space has been amazing so far.  The dogs can play without knocking into something and the room feels so much larger.  To hold all of the equipment for the TV, we hung two shelves on the wall under the TV and took everything off the floor.  Looking at the picture, I need to paint that vent brown...

View of the room from the front door.  This time Goose had to get in the shot.
Above you can see how small our house is.  The blue walls are the kitchen and the brown wall to the left are the dining room walls.  It is a 3 bedroom, 2 bath house, but the living space can feel cramped at times.  

The room from the corner of the couch
There is still some work to be done in the room, but we're so happy with how this quick addition has really opened up the space.  For the room, I'd like to:

  • change out the accent pillows - those green ones have seen better days
  • lightening up the room with lighter colored curtains.  The ones hanging now are black out curtains and we definitely want to make sure the room stays dark
  • raise the curtains to give the room more height 
  • add a rug 
  • paint the walls
It's a long list, but as Stephen likes to say - we have forever.  


Added bonus - storage space!
An added bonus to the project was new storage space behind the couch!  I didn't take the best pictures, but in this one you can see two of the storage boxes we've been able to add.  Behind that one are SIX more, larger, plastic bins from Ikea.  We've only filled three of them so far, but have plenty of more stuff to organize and store in our new found space.  I'll probably buy one more of those prettier boxes the next time we're at Ikea since there is still some space.  

Wednesday, August 8, 2012

Why I LOVE Pinterest and How Pinterest Works

I'm not sure I can ever go back to life without Pinterest.  I don't want to go back to the days of buying magazines and tearing out pages for inspiration.  (But I still love magazines, especially food magazines.)  For example, I didn't buy a single wedding magazine while planning my wedding.  I remember friends planning weddings 5 or 6 years ago and going to their house to see the stacks of wedding magazines with dog eared pages and binders of torn out pages with ideas.

Not only is wedding planning SO much easier with Pinterest, but finding new recipes is easy too.  Form healthy to unique to gluttonous and wonderful baking recipes - the list is almost endless.  There are so many blogs out there with recipes that will never make it into a cookbook or website.  I love that I can find them now.  Let's not also forget cleaning and home organizational tips.  Pinterest is full of ways to make your live simpler around the house.  I had no idea white vinegar was so useful until I saw pin after pin of uses, several that I have tried.

Lastly, crafting.  OMG, the craft ideas are overflowing on Pinterest.  I have close to 100 pins on my Craft Ideas board.  Before Pinterest I had a few craft projects in my head, but with Pinterest I've been exposed to so many new things I never once considered to try on my own.  But with links to tutorials on basically everything I could ever want to try, the world has opened new doors to me.  I even registered for a sewing machine on our wedding registry so I can learn to sew to make items for around the house!

Pinterest works like this.  You set up an account and once approved you can search through other people's pins and add them to boards that you have created so you can come back to them later.  When you log in to the site this is what your main page will look like, below.  The pins update constantly and you can see what pins that you have added that have been pinned by others down the left hand side of the page.  Every time I go to this page it is different based on how active the people I'm following are that day.


Think of the boards as the folders you used to keep when you tore out pictures from a magazine.  You did that, right, just like me?  Each board is a different topic and you can have unlimited boards.  At least I think you can, I've seen people with more boards then I could even try to keep track of.  They must be professional pinners.  (Is that a job?  I want it.)  I have boards for Craft Ideas, Wedding Inspiration, Food and Drinks, Holidays, Books I want to read, and several more.  Here is a screen shot of what your account page on Pinterest will look like with your boards.  I have a few more that don't fit on the screen until you scroll down.

My Pinterest page
Into each board you add your pins.  You can see in the image above how many pins I have in each board.  Obviously this changes daily as I add pins.  Each board has a "cover photo" which is the large picture and you can set this to something or it is your most recent pin.  To get inside a board you click on one of the images in that board and it brings you into that section.  Below is my Holidays board.

My Holiday Board
Using my Holiday board above you can see that each pin is linked from another website, shown in the grey below the picture caption.  Each picture gets a caption which you can create.  This caption is seen by all of your followers and anyone searching for a key word that is in your caption.  When you click on one of these pins (photos) it makes it larger so you can see it in more detail and from there you can double click on it and it will open the original website with that content in a new window.  I have a few of my projects posted on one of Pinterest boards and it's fun to see web traffic to the blog from Pinterest.

You can add to your boards in two ways.  First, and the most fun in my opinion, is just browsing through Pinterest.  You can see pins from people that you are following or everything that is being pinned at that moment.  You can even search Pinterest for ideas.  When I put in the search box "red truck" below are the pins that show up for me.  Of course, if you go and search for the same thing it may look different depending on what has been pinned since my search.


When I was planning a baby shower I had a board dedicated to just Baby Shower ideas and I searched through tons of key words for inspiration.  Same for when I was trying to find ideas for how I would wear my hair for the wedding.  I'm pretty sure I pinned close to 10 different photos to my board and I showed them to my hair stylist when I went in for my trial.  Much easier than flipping through several wedding magazines and tearing out pictures or printing pictures off a web page.  It's great when you find a pin that you like and you go to the board where that pin lives and you find other photos that were inspiration to that pinner.

The second way to pin to your board is with a button that is loaded to the Toolbar.  It's so simple to use!  For example, I'm on a blog and the blogger has posed a new recipe that I want to try later.  I go to the "Pin It" button now on my toolbar and it pulls up all of the photos on that current page that I can pin to my board.  I select the picture that I want to pin (make sure it's representative of what the content is) then I add a caption and select which of my boards I want that pin to land on.  Easy as that.

Feel free to search for me and browse around all of my pins.  There is so much out there to see and do! A few of my favorite pins from the past few days:

What a fun trick for holiday decor from Dandelions and Dust Bunnies

A project I can't wait to try!  Using Mod Podge to create a giant "canvas" for the wall from Life as a Thrifter

A tutorial for no-sew bunting that I used recently from Corner Blog.  More on the project to come later.
 If you haven't given Pinterest a shot, don't be afraid.  All you have to lose is a few hours of free time!  Stephen said something that was pretty true yesterday during one of the MANY commercials during the Olympics last night.  He said, "Should I assume that if you have your ipad in your hand I should assume everything you say relates to Pinterest?"  Yes, he's right.

Pinterest does have an App for the iphone and ipad, but I'd rather use the website on my ipad instead of the app. The app never seems to work right for me.  I'm sure they're working on it.

Monday, January 9, 2012

DIY Jewelry Organizer

I have a lot of jewelry.  Not the fancy kind, but the fun, dress-up-a-boring-outfit jewelry most likely purchased at Anthropologie or somewhere similar.  I love big, bright necklaces.  My jewelry box I've had since high school hasn't been cutting it and the jewelry tree that I bought to help store my stuff was at capacity.

I turned to Pinterest to see what other DIY options were out there.  SO many to choose from!  I dare you to run the same search.  I found this blogpost and it was exactly what I wanted, but on a larger scale.  My friend and I dedicated all afternoon on Sunday to our craft.  Our first stop was to Anthropologie to get some of their gorgeous knobs and handles.  They have SO many to pull from, I could have spend hundreds of dollars.  We also bought some knobs and handles at Home Depot and Jess made a stop to World Market to get one or two as well.

Once we had our knobs we went to The Home Depot to get some plywood.  We bought a 2'x4' board and had them cut it in half for us so we're both working with a 2'x2' square.  We decided to cover the board with some thick, solid fabric and a decorative ribbon so we headed to Hancock Fabric and Michael's.  I went with a grey/lavender fabric and some yellow and black ribbon.

I borrowed Stephen's power tools for this project - a drill and a staple gun.  I was working faster than Jess so I made a few mistakes that she was able to learn from along the way.


Construction Steps:
  1. Layout all of your handles and knobs on the board.  TAKE A PICTURE OF THEM so you know how they should lay out once you move them to start drilling your holes.  I recommend spacing them out so your long necklaces can hang and have space.  Also, on the back of the board, mark what side is the TOP. 
  2. Measure the holes precisely for your handles.  They were by far the hardest to put into the board once the fabric was in place.  
  3. Once everything is marked on the board, start drilling your holes.  (you'll see in the photo that it can look like a big mess if you don't label them!)
  4. Cover the board with the fabric using the staple gun.  Start with the top, staple it down, then go to the bottom and staple that side down, pulling tight.  Then go to the sides.  Don't trim the fabric until everything is stapled in place.  (I used one yard of fabric to cover my board.
  5. This is where it gets tricky.  You'll have to mark the holes you made on the fabric so you can push through the knobs/screws.  I made marks with a Sharpie, Jess just pushed through a small screw driver from the back of the board through the front, through the fabric.  I recommend her technique.  
  1. Then it's time to start screwing in your knobs and handles.  

This is what my Jewelry Organizer looks like with all the knobs and handles in place!  The handles will be used to hold earrings and the knobs will hold my necklaces and bracelets.  The upside-down drawer pulls are perfect holders for small earrings and rings, top left.  


I still need to glue gun (a new Christmas present from my sister!) the remaining fabric to the back of the board so it stays in place and add a picture frame hanger to the back of the board so I can hang it from the wall.  It's pretty heavy as it is and will only get heavier as I add stuff to it.  To prevent the screws from scratching the wall when it's hanging I'm going to cover them with my remaining fabric or some styrofoam.  

The last step will be to add the ribbon to the top for decoration.